


If you’re entering a piece of work into one of the quilt shows this year, then you can be sure that there will be a category on the marking schedule for ‘finish’, basically how neatly are your quilt’s edges finished. But doing a good job on finishing your quilt isn’t just about scoring well with the judges, it’s important to pay attention to these details because it really affects the overall impact of your work. Think of it like a painter choosing the right frame for their painting - a scruffy choice, badly executed will spoil the most excellent of paintings.
Your binding really can be like a frame. Usually I like to use a visible binding rather than a faced edge for my quilts. While facings are quite a popular choice with a lot of contemporary quilters, I prefer the sharp outline that a very narrow binding gives a quilt. Lately I’ve been making quilts that have a lot of white in them. Often they’ll be hung on a white gallery wall, or on a white wall at home. So, I purposely choose a dark or bright binding to ‘outline’ the work. It helps it stand out on the wall and stops it melting into the background.
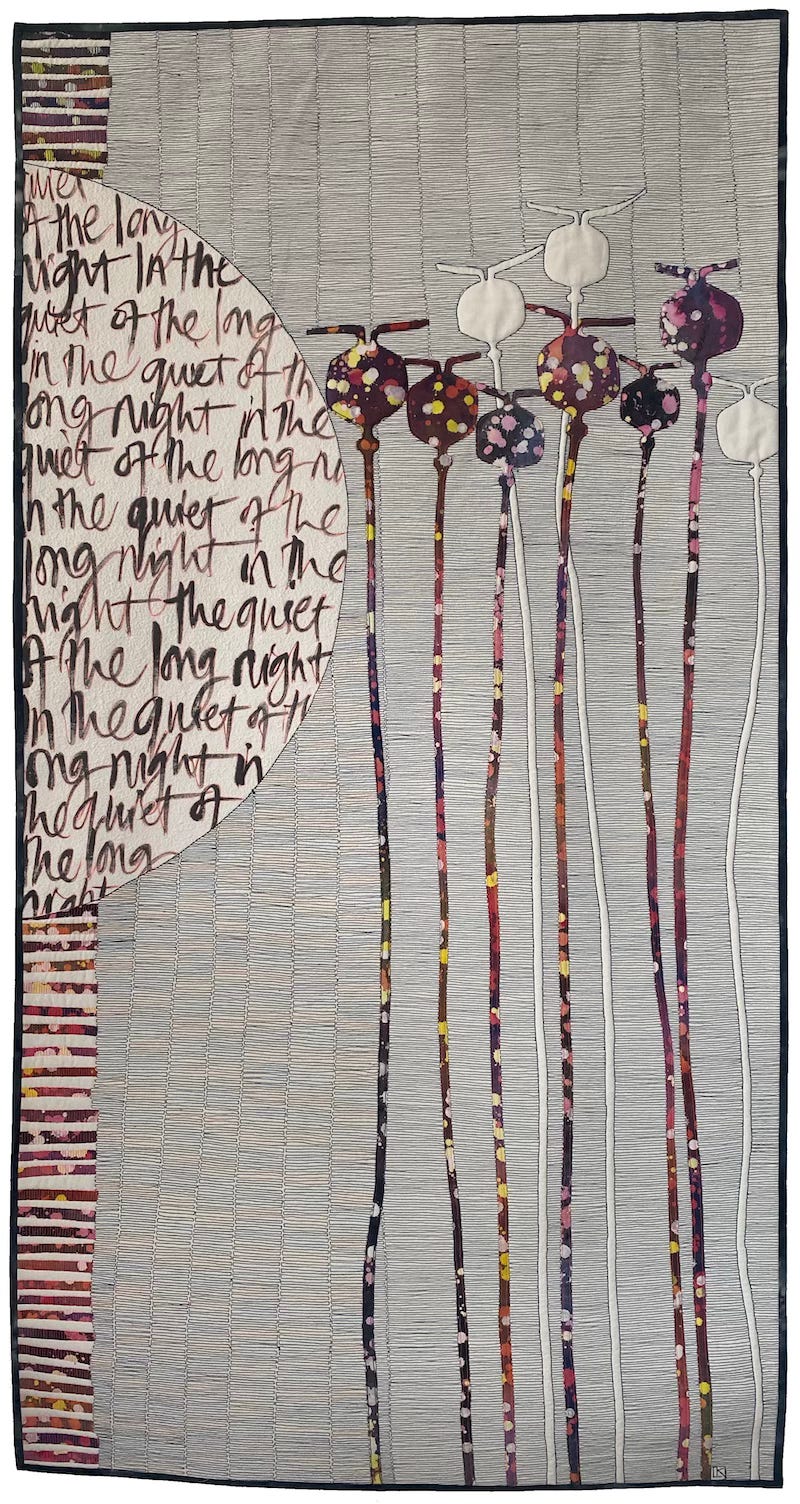
You can see both of these quilts which have a lot of white areas, have dark bindings to give them a nice strong edge. I tend to use hand dyed black and charcoal grey but also add in sections of colour to the bindings too when the edge needs a lift.

A neatly applied binding that’s well finished is justice for all the work that you’ve invested in making the quilt. Let’s face it, it’s taken weeks if not months to make the thing, it’s only right to spend a little longer making sure it’s finished properly.
If you think a binding is right for your next piece, here’s a little guide on what works for me:
Use fabrics that also feature in the main body of the quilt. It’s a great way to use up leftovers and will mean that your binding relates perfectly.
A dark binding is often a good choice.
Unless your quilt has curved edges your binding should be cut on the straight of grain. Bias binding is stretchy and won’t give you the ability to control the edges of the quilt, (more on that in a moment).
Sewing the binding to the front of the quilt by machine and then hand hemming it to the back gives the neatest results.
What to do
First cut your binding strips. I cut mine at 1.5 inches wide. As I mentioned, I always cut binding on the straight of grain. Bias cut binding is very stretchy which is great for curves. If your quilt has straight edges it’s not actually helpful! Here’s why: sometimes when I make a quilt, and maybe the same happens to you sometimes, I don’t always have a perfectly even amount of quilting all over the whole thing. that can mean that sometimes, there’s a bit of undulation in the surface and even a bit of waviness at the edges. You can use your binding to control this. If you apply a tiny bit of tension on the binding strip as you apply it, that will stabilise the edge.
Next, I square up the quilt. I usually work whole cloth and do lots of stitching so I tend to end up with a bit of distortion. I use my largest quilting rulers and a rotary cutter to ‘square’ the quilt and trim off any bits of excess.

This new piece I’m making it quite small so it’s very easy to square up. I just pop in a big ruler, line up and trim with the rotary cutter. There’s not much to trim off with this one, it’s mostly just the extra wadding and backing that I’ve allowed.
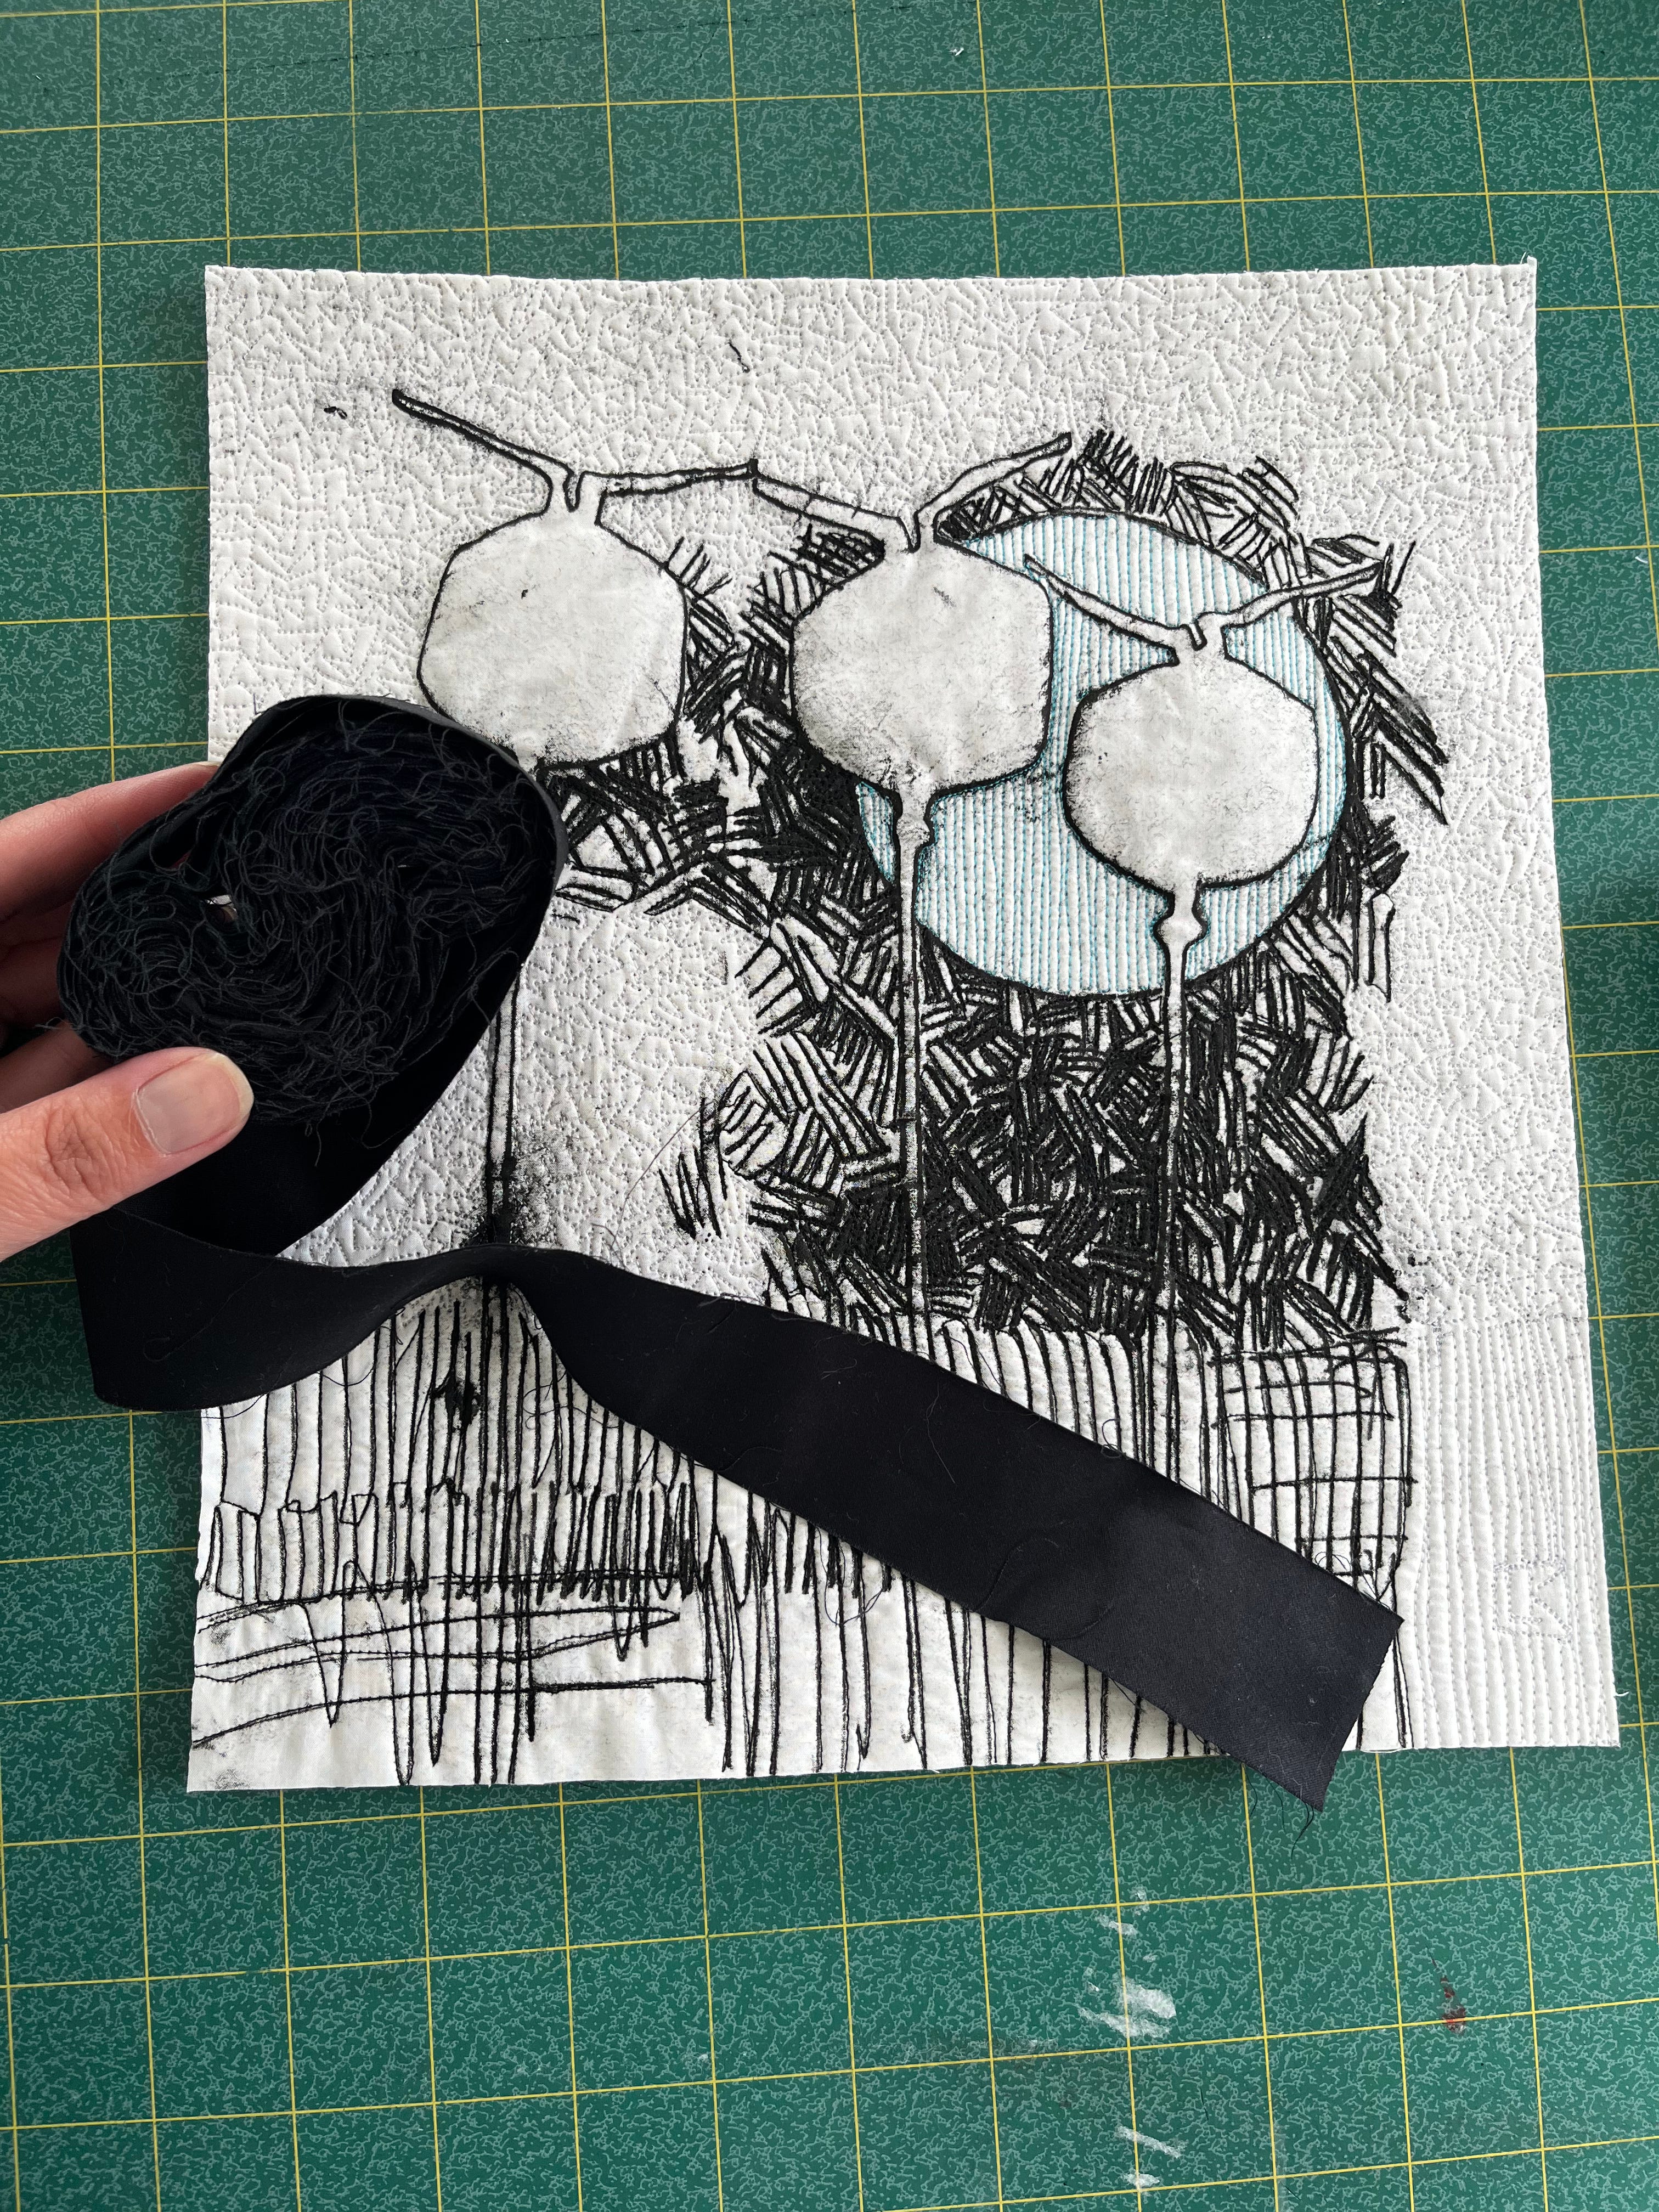
Because I frequently use black binding, I’ve batch cut some strips, sewn them together and then I just keep it rolled up in the studio ready for when I need it. My strips are always cut at 1.5inches.
Start applying the binding part way along a side, not at a corner. Begin by folding back about half an inch of binding, so that at first you’re sewing through a double layer of binding as shown in the photo.

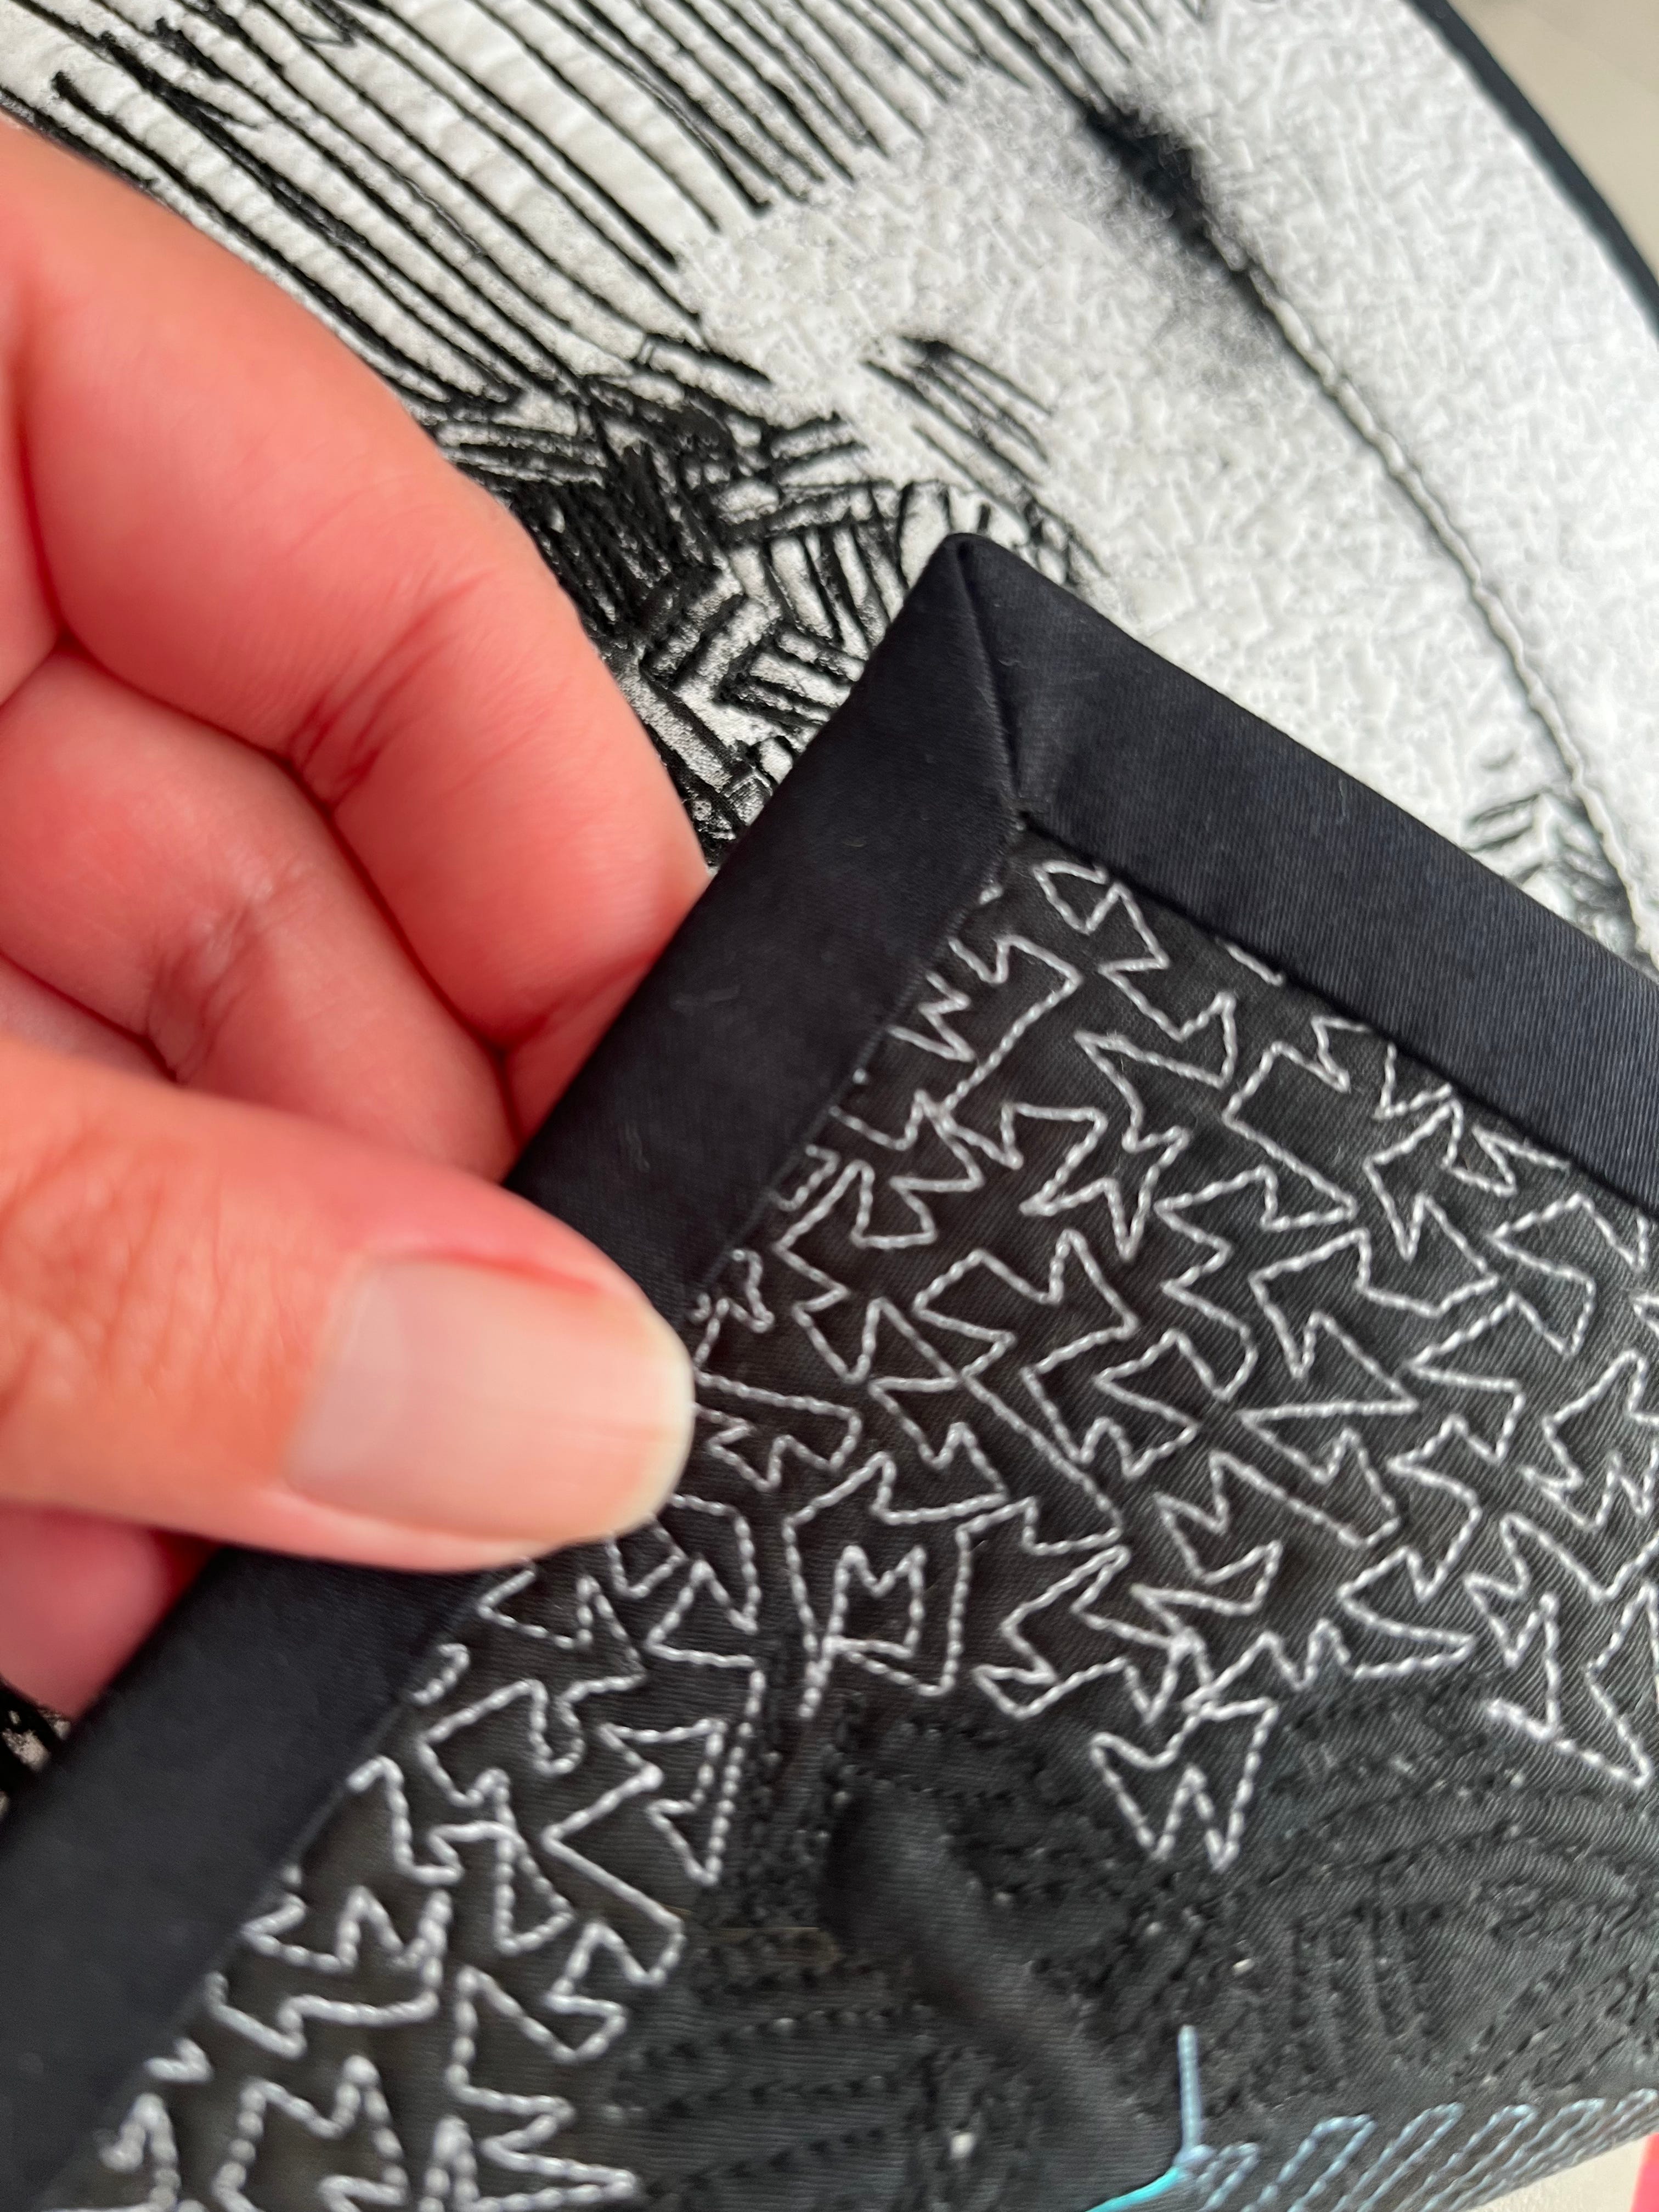
The raw edges of the quilt and binding should be lined up. The seam allowance you take here dictates the visible width of the binding on the front of the quilt. I personally think a narrow binding is most elegant and so even on my large quilts I still use a scant 1/4” seam allowance.
Navigating the corners is easier to do than describe in words, so take a look at this video and you’ll see what I do…
Once the binding is machined to the work those edges should be secure and stable and the final job of hand hemming is all that’s left to do. Hand hemming obviously takes a bit of time, especially on a large quilt. I just try to schedule it in so I can do it in the evening while half watching a movie!
And here’s how it looks on the front and the back once done.

I hope that you find this article useful. If you like it and would like more like this, please consider signing up for our paid subscription option. It’s just £5 a month for access to all our posts.
Thanks for reading today,
Laura x
Super helpful!! Thank you! I was using 2 1/2" for years and just went to 2 1/4" but it was still too much. Hmmmm.... have to experiment a bit more. I am trying to make a decent machine binding on both sides. However, for a show quilt ... Will Definitely Hand Stitch. Loved your demo's. I do think if it is a larger quilt, perhaps a bit wider binding. I can see narrow on a small quilt. Yours looks fabulous and I love the black binding too!
I have done it incorrectly for years! Thank you!