


Newsletter 25th April 2024
Newsletter 25th April 2024
Our weekly newsletter, free for everyone

Hello again. Thank you for the kind notes on last week’s newsletter. We’re so pleased that you enjoyed it. Don’t forget, you can comment on the newsletter, or you’re always welcome to pop an email over to us if you prefer.
We have something a little different for you this week. Rather than a news update we have a mini workshop. I’ll show you how I’ve been starting a couple of pages in my Single Sheet Sketchbook. But first, I’ll start this week by sharing a resource photo with you. These resource images are photos that I take whenever I come across something that I think I might want to draw, or work with in some way, at some point in the future. These tulips caught my eye in the garden last week. I thought their colour in the sunlight was just spectacular.

You’re very welcome to save this photo for use in your own work if you’d like to. I’ll show you what I’ve been doing with it, but first, let’s take a quick look at the other photos I took that day…


You can see that I tried varying my viewpoint with the camera. Obviously I’m much taller than the tulips so my natural view point is to look into the flowers from above. I really liked the photos looking down into the bowls of the flowers, but crouching down next to the plants meant that I could photograph them side on and make more of the stems and leaves. When you’re out and about gathering reference photos like these, I’d always encourage you to try to alter your viewpoint to get a new perspective on your subject.
So I’ve got a really nice reference photo, now what to do? Of course there are lots of ways to get started, and what you might choose can depend on the outcome that you're working towards, and the media and processes that you enjoy. I often work in sketchbooks but I like to use my iPad too.
I’ve opened the photo on my iPad using the app Procreate. This is a paid-for app, but I would highly recommend it if you are at all interested in drawing and painting on your iPad. With the photo open in the app, I add a new layer with about 50% opacity, think of this as digitally placing a piece of tracing paper over the top. Next I select a pen tool and the colour I want and I trace around the main shapes of the photo. Here’s a timelapse of that process…
During the video you can see the photo below the semi transparent layer, then once the tracing is complete, I turn the opacity back up to 100% on that top layer and the photo is hidden below. I now have a clean black and white line drawing of my subject.
This is a really quick way to get to know the main shapes in your subject matter. You can quickly trace down the big shapes and eliminate detail, or in fact anything that you’re not keen on.
Next I print out the tracing so I can collage it into my book.
But what if you don’t have an iPad, or don’t enjoy working digitally? Well you can do the exact same thing with a printed photo, piece of tracing paper and a pen! The point of the exercise will still be the same - learning about your subject matter, recording the main lines and shapes, and starting to observe how the composition is working.
Here I’m using just a basic sheet of tracing paper, which you can get from art shops or stationery shops, and a fine-liner drawing pen. The tracing paper obscures the detail so there’s no option but to simplify.

These tracings are very quick to do, so consider doing more than one, or trace variations of source images.
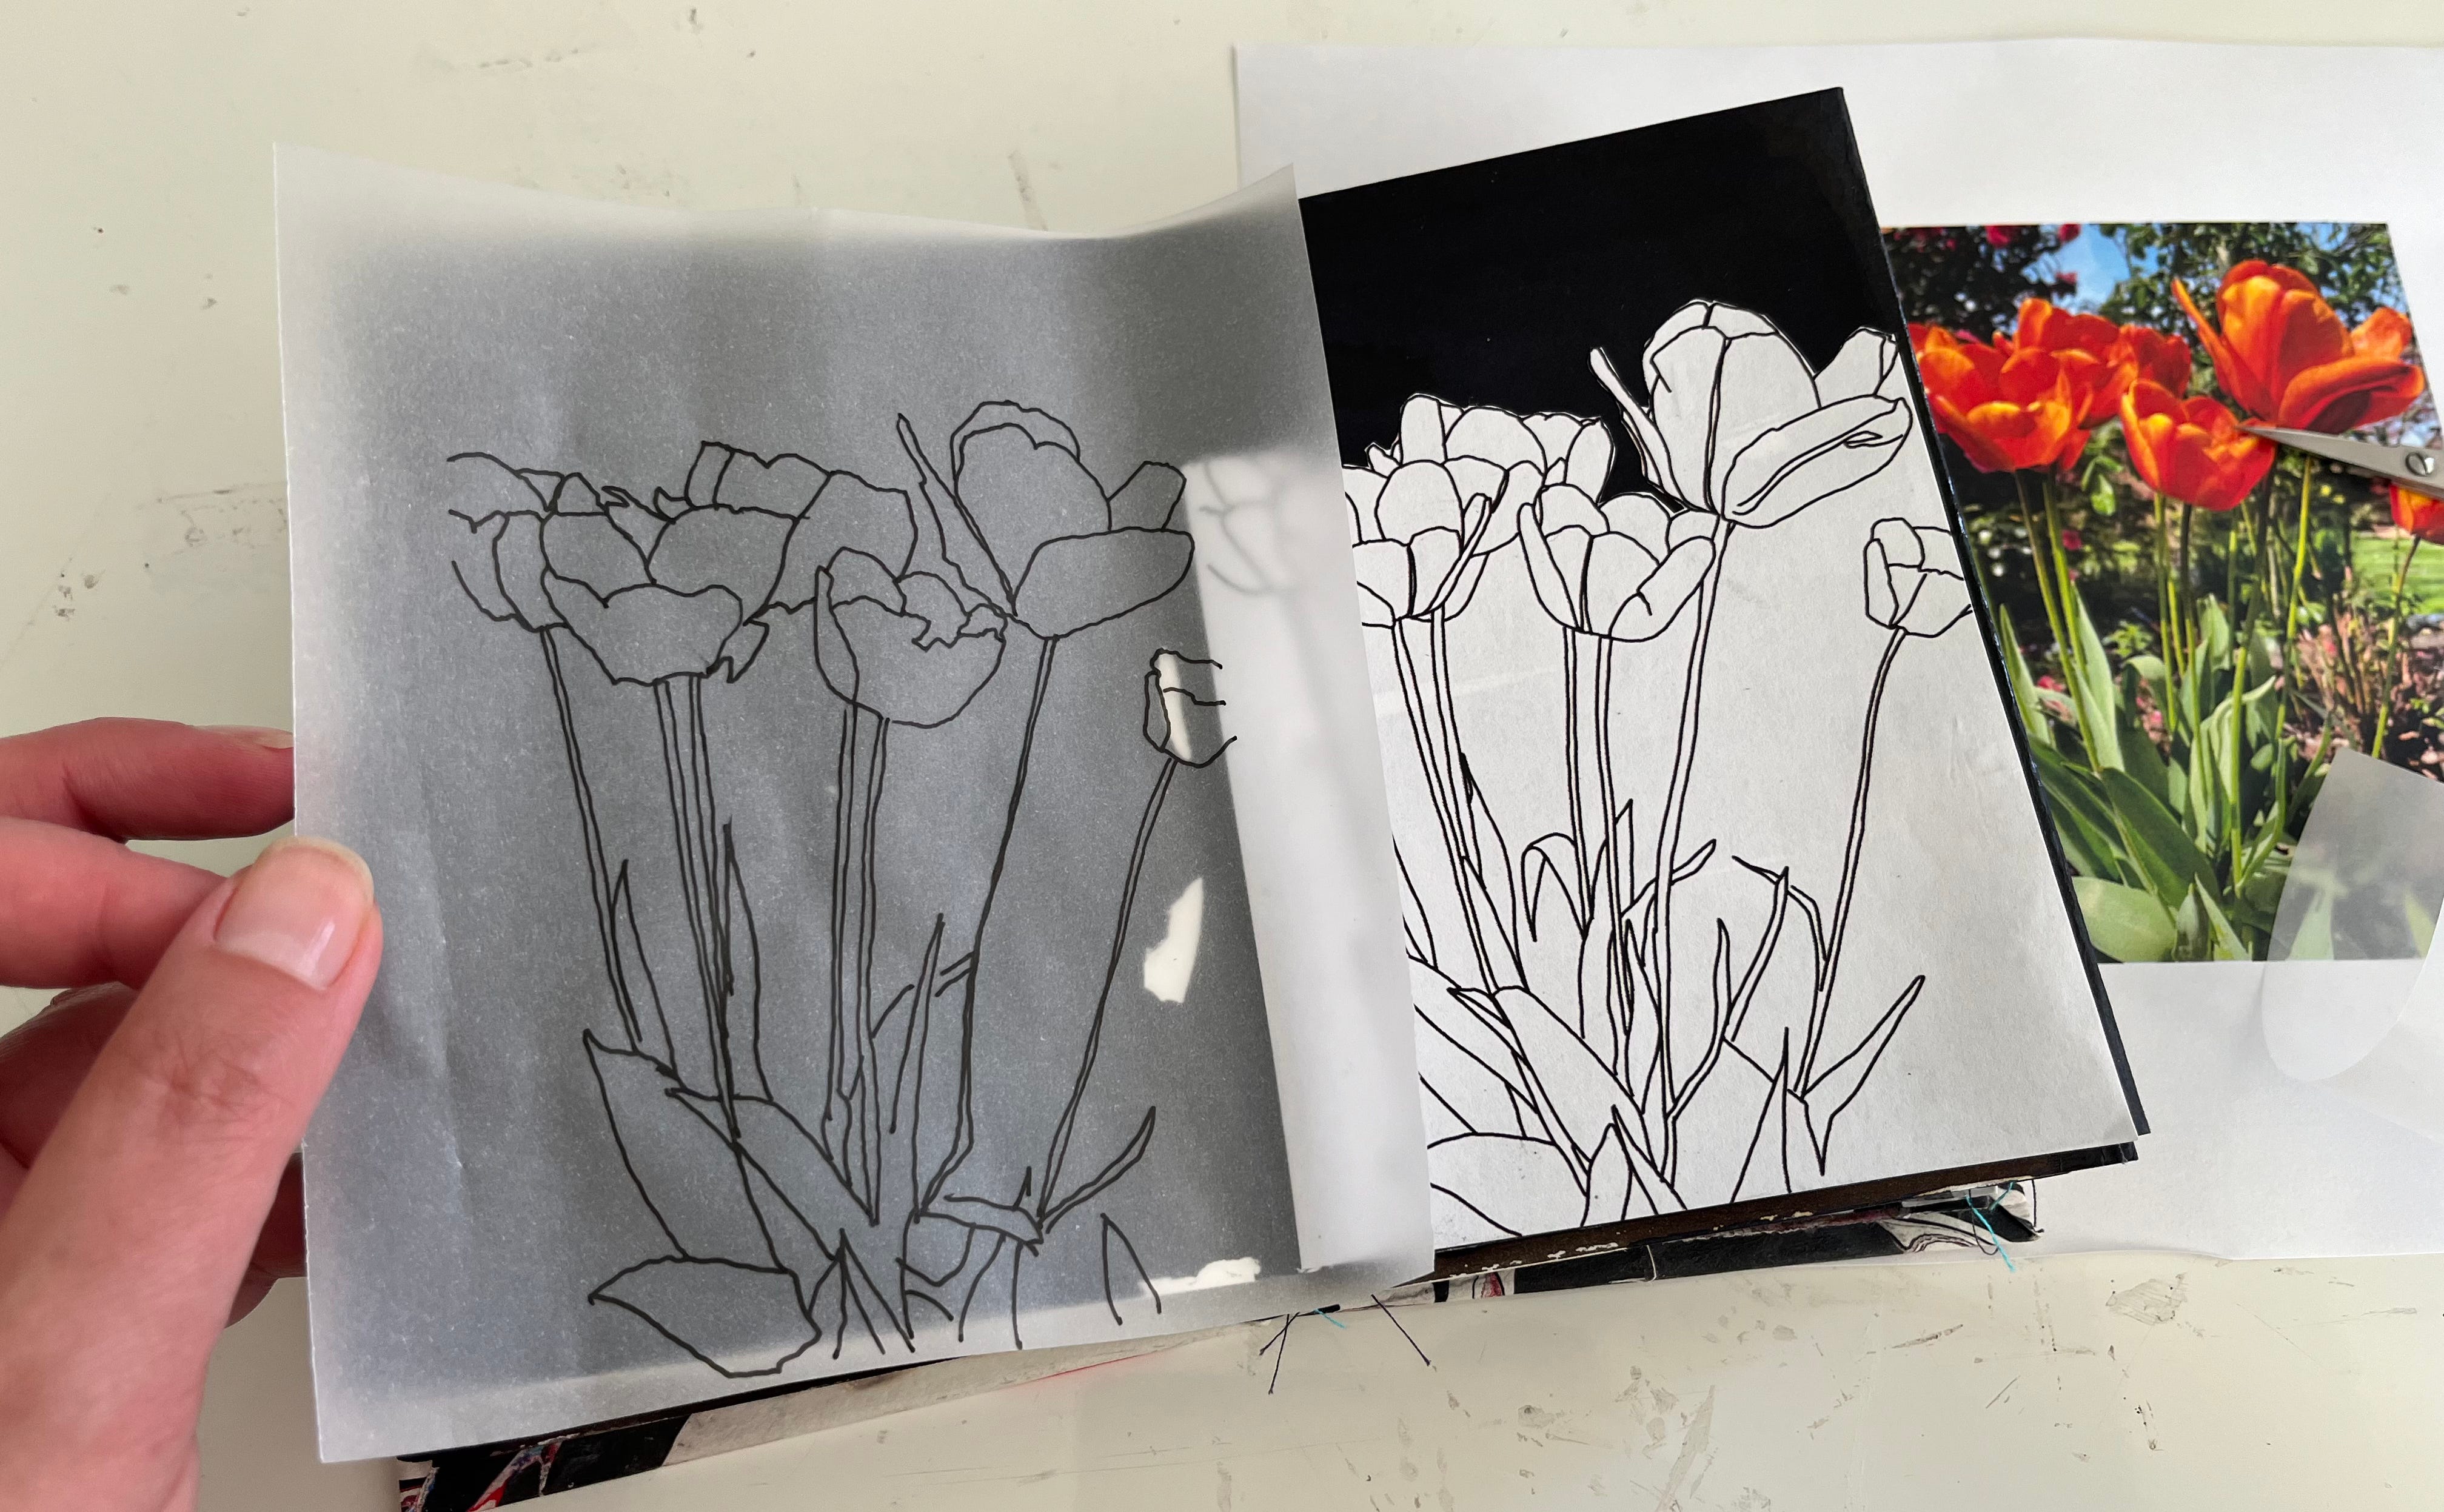
Here on the left is the tracing I’ve drawn by hand, the reference photo on the right and in the centre is the digital tracing that I made on the iPad. I’ve printed it to basic copy paper and cut away the top section. Compositionally I like very much how the flowers divide the space. There is a band of flowers, above it is one area, below them is another filled with the stems and leaves. Cutting away the top section draws attention to that I hope.

Here I’ve trimmed the hand drawn tracing in the same way. There is no nice way to glue tracing paper into a book so I always sew it in. You can see I’ve done that with some machine stitches in a white thread. I only sew down the left hand side leaving the semi transparent sheet to lift and curl. What’s the point of having all that transparency and not let it have some life away from the background page?

I enjoyed the white stitches on my black page and so added more lines of them above the digital tracing. I do this quickly, just as a I would if I were using a white pen to sketch in some lines, not worrying about whether they are perfect.

Of course whenever you stitch through a page, what’s happening on the back might be interesting. Turns out I had black thread on the bobbin. I’m really liking the black and white thread ends and the white halos of paper around each of the holes that the needle has punched through.

I hope you’ve enjoyed seeing this method for getting started with a reference photo and taking a first few steps in your sketchbook. If you made a Single Sheet Sketchbook, then you might like to give this a try, but it’ll work equally well into whichever sketchbook you might be working into at the moment. And if you aren’t working into a book, maybe we can tempt you to start one! Of course it’s not passed me by that I started this article by showing you a photo and saying what glorious colour is has. Then I proceed to work only in black and white. Yeah I know. I am working a lot in black and white at the moment so you’ll have to forgive me that one. Maybe we’ll look at working with some colour next time.
If you’d like more about using tracing in your work, please check out our free workshop Don’t Draw, Trace! which you’ll find on our courses website.

More this week
Before I go, let’s just recap on what else we’ve posted here on Substack since the last newsletter…


I wrote about my daffodil painting with water mixable oil paints in the post called Painting Daffodils and Linda shared one of her great watercolour painting tips in her post Watercolour Detail.
Paid subscribers, you’ll find you can read those posts and everything else on our page. If you’re not yet signed up for a paid sub and you’ve enjoyed today’s newsletter, we’d love for you to upgrade. It’s just £5 per month for lots more information like this.
Thank you for reading our newsletter today. I hope you feel inspired to get out your materials for whatever you’re working on and get cracking for the rest of the day. We’ll be back soon.
Laura x
I always forget about tracing and as I'm always dissatisfied with my drawings it's an excellent resolution.
I loved this and want to try myself but have not been able to open in procreate or my photos. Coul you help here?